

Here is a step-by-step photo demo on how to get the sashing in your quilt top to come out looking nice and square, with corners meeting up (most of the time) and without any weird stretching or pulling. This tutorial was written for the beginning quilter so I have broken it down into the most simplest of steps. So if you're more advanced, please just be patient with me. :)
|
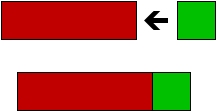
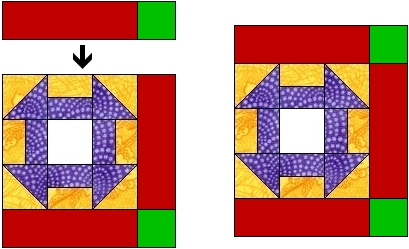
Step 1: Attach a piece of your sashing material to the right side of your quilt block. Repeat for all your quilt blocks. |
|
Step 2: Attach a setting square onto the end of another piece of your sashing material. Repeat until you have as many of these pieces as you have quilt blocks. |
|
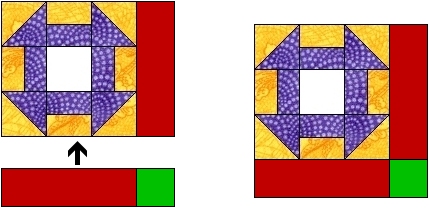
Step 3: Attach the piece you made in Step 2 to the bottom of the piece from Step 1. Repeat until all your quilt blocks have a Step 2 piece attached. |
|
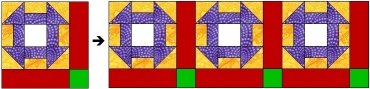
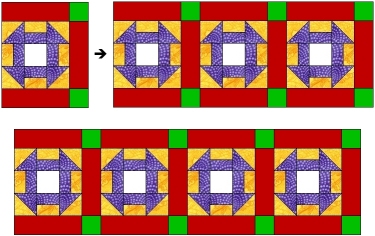
Step 4: Join together the pieces you made in Step 3 until you have enough to make one row of your quilt pattern. In this example, the row is 4 blocks long. Repeat until you've made all but the top-most row; put the blocks for the top-most row aside for now. (Special instructions on making the top-most row begin in step 7.) |
|
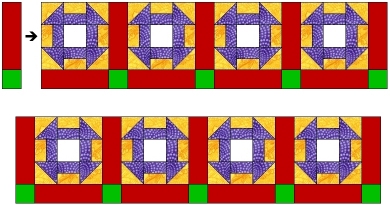
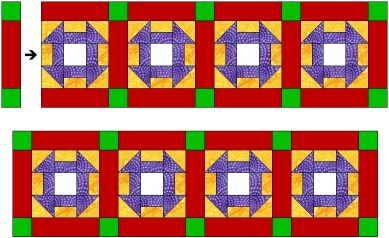
Step 5: Notice how the blocks are surrounded by sashing on the bottom and all the sides except the left side of the left-most block. To finish this row, create an additional Step 2 piece and attach it to the left side of the left-most block. Repeat for all rows created in Step 4. |
|
Step 6: Now you join together the rows you finished in Step 5. See how your quilt top is coming together so nicely? |
|
Step 7: Now to deal with the top-most row of your quilt top. You will have to add sashing pieces from Step 2 to the top of each block that will be in the top-most row. So make an additional Step 2 piece and attach it to the top of a quilt block. Repeat until all quilt blocks for the top row have a Step 2 piece attached. |
|
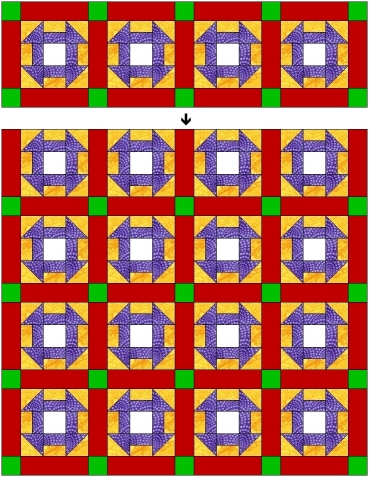
Step 8: As in Step 4, you now will join together your blocks from Step 7 to make your top row. |
|
Step 9: As in Step 5, you will need to create a sashing piece to put on the left side of the left-most block of the top row. Take a Step 2 piece and attach a setting square to the other end. Then attach this piece to the left side of the left-most block. |
|
Step 10: Your last step is to take the row from Step 9 and attach it to the top of the quilt. And now you're done! It's so easy and simple, really. And you don't have to worry about pulling things weird to get everything to line up the way you want it to. Hooray! :) |