For those of you who have questions as to piecing together several pieces of material to make a backing for a quilt, here is a tutorial based on my own experiences. There may be better ways to do it than I've written here, but this is what has worked for me. :)
When making your backing, it is preferred that you make your piece of material large enough to have 4" extending beyond your quilt top along all 4 sides. For example, if you have a quilt top that is 50" x 50", the backing material would have to be 58" x 58". For your own project, be sure to use the measurements of your own quilt so that you get the correct size backing.
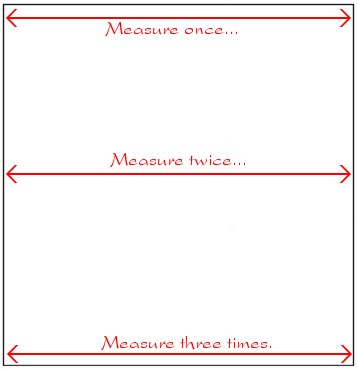
Image 1: First, measure your quilt size. I've been told that it is best to measure it at the top, the bottom,
and in the middle, and to use the largest of those measurements. Since cloth can stretch, and since our seams may or may
not be straight, your quilt top will not necessarily be square. By measuring in so many places, you are assured that your
quilt back will be large enough to accomodate even the largest part of your quilt top. Measure both the width and the
height in this manner, then record your measurements. Use the largest of them as the basis for calculating your backing
material's size (largest measurement plus 8").
Images 2 and 3: Next, you need to determine if you have enough backing material, and which way would be the most
efficient way to piece it together. I do this by first laying out my quilt top on the floor. I take my backing material
and I fold it in half, then I try laying it down on top of my quilt top. I lay it down both along the quilt's length and
along the quilt's width to see which way would make the most efficient use of my material.
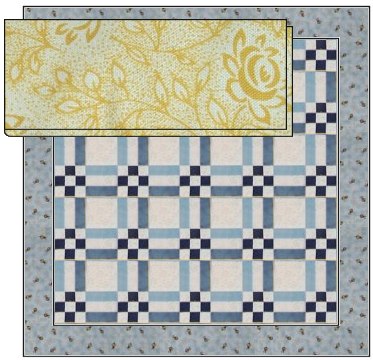
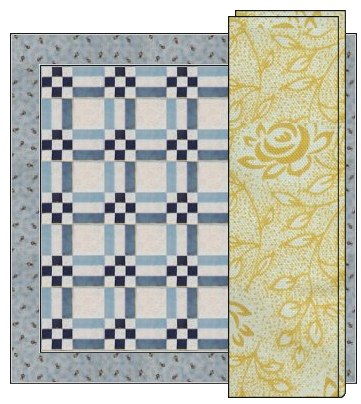
Image 3: As you could see from the last two images, in this example it will be best to piece the material so
that the seam runs the length of the quilt. (Even though the image doesn't imply it, let's assume that the backing material
is wide enough that putting two pieces side by side would be wide enough to accomodate the size of the quilt.) In this
case I'd just cut the piece of material in half, lay the two pieces so that the right sides are facing each other, and
run a seam down the length of the material. Make sure that you leave enough of an allowance to cut off the selvage along
the edge of the material after the pieces have been sewn together. You will end up with a piece of material that is large
enough for your quilt.
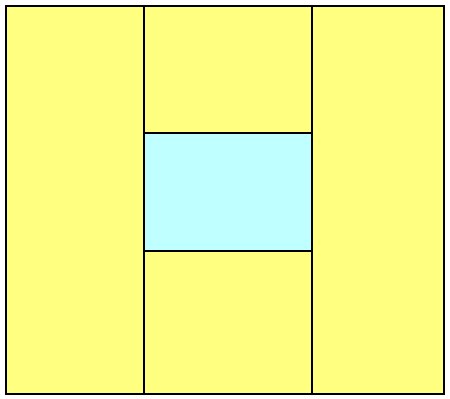
Image 4: Now, it may be that you will need to be more creative in piecing your backing, or you may need to use
more than one material to piece your backing, which is absolutely acceptable to do! In that case, just modify the method
I used above to lay out your backing material to find the most effecient way to piece the materials. You may end up
with something that looks like this:
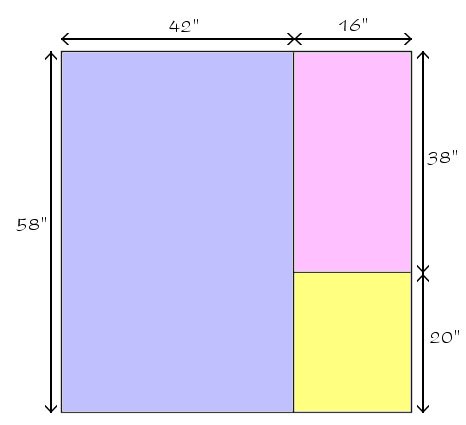
Image 5: For one quilt that I made, I had almost enough of the material I had chosen to be my backing, but I
was just a hair short. I had some scrap material that would complement the original material I had chosen, so I used
that scrap material to supplement what I already had. This is what the backing material ended up looking like:
The main thing to take away from all of this is to have fun with piecing your backing material! Try new things, make it as "neat" or as "messy" as you want. There is no right or wrong way to do it. :) Happy quilting!